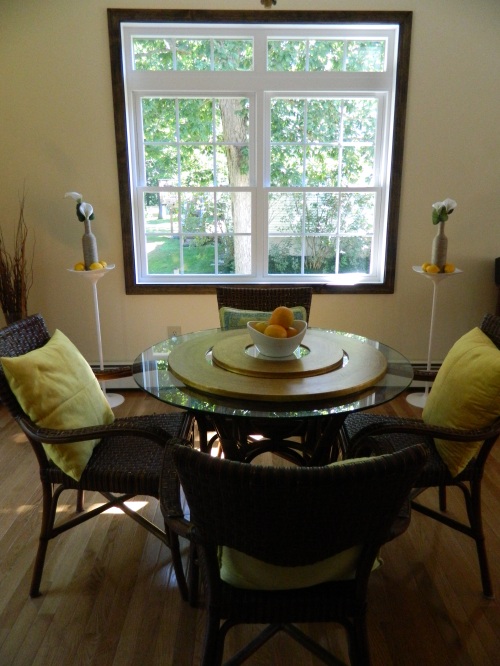
I really didn’t want to put any curtains up on the new window. I like the blissfully bare look on that particular one. But last weekend, we realized that it might be nice to have the option to have a little privacy if we want it.
When I usually hang curtains, I hang them 6″ to 8″ above the trim and 8″ to 12″ wider than the trim to give the illusion of a larger window. This one was different to me. Since there is a transom (a smaller row of windows on the top) I wanted to highlight that since it’s a little snazzier than a plain old window.
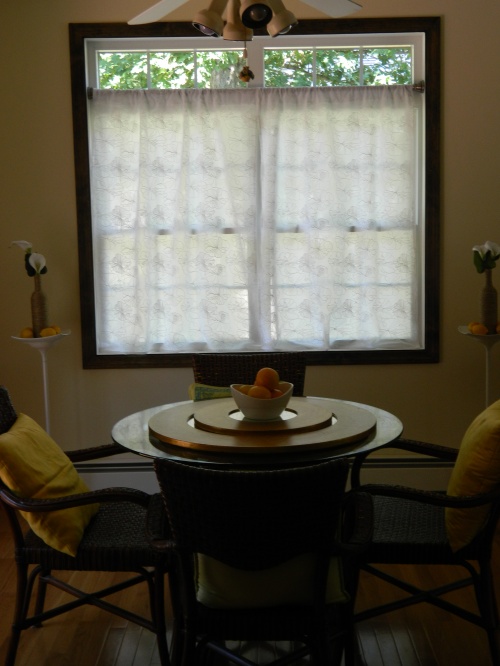
I decided that a tension rod placed right below the transom would be a good place for it. Sheers would allow for privacy and still let a ton of light in. I spent a few hours (seriously) in the window treatment sections of Target, Bed Bath And Beyond, and a few other stores. None of the tension rods were long enough for my window. So, I improvised. I bought a shower curtain tension rod. As for the curtains, I realized that I had a specific vision in my mind and I wasn’t going to find it in a store. I was going to have to make these babies.
I was going to attempt to sew my own curtains. This may not sound like a huge deal to most of you Martha Stewarts out there, but up until now, the most I’ve sewn was a few flower headbands and brooches! But, I thought, how hard could it be? Curtains are rectangles. I could do this.
I drove to Joanne Fabrics and searched for the perfect lightweight, cheerful, white fabric. I found it, then discovered that there was exactly enough left on the bolt for the curtains. This may sound like a wonderful thing to most people, but to me it meant that there was ZERO room for error. I wanted to buy a few yards extra, should I mess it up royally. But, me being me, I decided to give it a shot anyway.
The first thing I did was figure out the dimensions I needed each curtain to be. I added about 4 1/2 inches extra to the length for a small bottom hem and the pocket to put the rod through. I added an inch to the width to allow for a small 1/2″ hem so it looked nice & clean. Then I cut it that size.
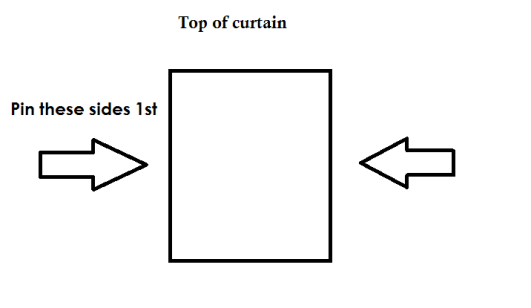
Next, I measured 1/2″, folded, and pinned the fabric vertically.
Then, I measured 3 1/2 inches from the top of the curtain and folded it to the back. I pinned it, and sewed a straight line.
The last part to do was the bottom hem. In order to make it look more polished, I folded the fabric to the back 1/2″ then folded over again another 1/2″. Pin then sew. Easy peasy.
Slide these puppies onto the tension rod, put it in place, step back, & feel like Martha Flippin Stewart while you realize you actually just sewed your own curtains 😉
Here’s what they look like when we don’t want the neighbors to see me eating my morning oatmeal in my ripped nightshirt & undies…
I didn’t like the way they looked when they were just hanging & open, so I concocted tie backs from silvery grey ribbons and push pins.
I pushed the pins into the corners so that way I wouldn’t put more holes in our walls. I billowed the curtains out so they covered my ghetto tie back holders.
I know I’m far from a sewing pro, but I’m happy with the way they turned out. I didn’t follow any directions, I just kinda winged it and got lucky. I got over my fear of attempting a big(ish) sewing project…big as in big for me 😀
As of today, me likey. Once my A.D.D. kicks in, I’m sure I’ll be switching things up.
*****************************************************************************************
What’s the most ambitious thing you’ve ever sewn? Are you a sew-a-phobe? Let’s talk it out.
xo
Mindy


Very cute!!
The sewing machine and I are slowly learning to be buddies….slowly…
Min! Love them! you did a great job!
Wow I can’t even sew a button. Great job on privacy plus looks cute!
So pretty! I get WAY to ambitious when it comes to sewing, well any DIY project actually, and usually have to abandon it, come back down to earth and find a realistic way to finish it.
I actually have a post planned later today about sewing, mostly clothes and stuff, I have a dress I made a while back that I wanted to show.
looks great! And I LOVE that you left the top portion open! I, sadly, have just been kind of ??? about breaking out the sewing machine. I have one given to me by my momma… but just haven’t been bold enough to break it out! I really need to get on that since there are so many things I want to DIY!
Nicely done on the window Mindy!
Break it out! You are not an amateur D-I-Yer! I have faith in you Ash!
Hello my name is Sarah Miles and I’m a sew-a-phobe. 🙂 Lol You did an excellent job Mindy. I love that you made tie backs also, The fabric is way pretty, The area looks very inviting and cheery.
Thanks girl! Give the machine a second chance!